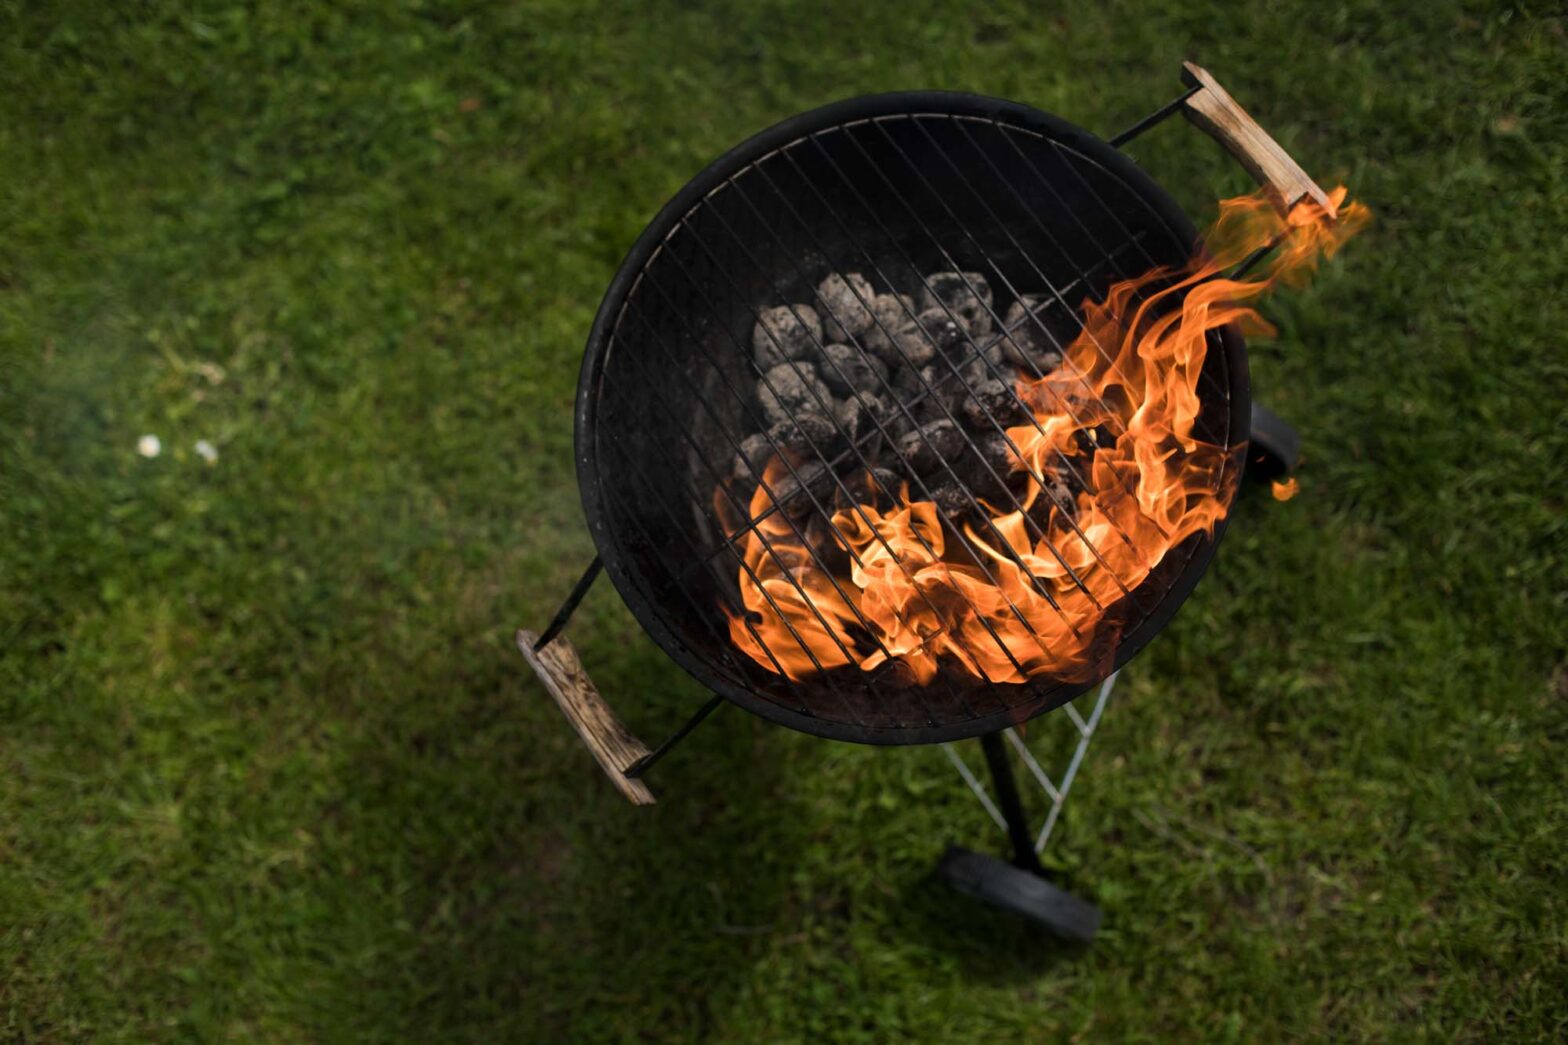
Grilling is the best cooking method there is. But it can also be challenging if you don’t know your way around. So, how to grill with charcoal for the first time?
Whether you’re grilling for the first time or switching from gas to charcoal, this article is for you. Read on to learn everything you need to know about grilling with charcoal.
Why Grill With Charcoal?
When selecting a type of grill, you generally have three options: gas grills, pellet grills, and charcoal grills.
Gas grill and wood pellet grills are convenient, there’s no doubt about it. But ask any grilling purist about charcoal, and he or she will be quick to tell you it has several advantages that neither gas nor pellet grills can outweigh.
Not only does charcoal grilling provide the best flavor—the quintessential flavor of grilled meat—but it also offers the most natural cooking experience.
It is with fire, after all, that our ancestors cooked dinner.
There’s something primal, caveman and cavewoman-like, if you will, about charcoal. The embers glow. The meat sizzles. The fats render from the meat and the juices drip down on the charcoal, perfuming the air and flavoring it with the smokiness that only charcoal (and wood) can deliver.
Among the mention-worthy benefits of grilling with charcoal are:
- Best bang for your buck: A decent charcoal kettle costs much less than a good charcoal or pellet grill.
- Hottest grilling temperature: Charcoal allows you to reach some of the highest temperatures for direct grilling, giving your food a unique, lightly charred look and a deeply savory taste.
- Unrivaled flavor: Where else can you get this irresistible smoky aroma that results from the smoldering coals and high heat of charcoal grilling? Yes, you can mimic it, but it’ll never be the same.
The flavor even multiplies during the grilling process:
Every drop that falls from the meat and veg on the charcoal creates this deeply flavorful steam that gets absorbed back by your food as savory smokiness.
How to Light Charcoal
There are four ways to light charcoal: with lighter fluid, with a chimney starter, with an electric starter, and with kindling.
Whichever method you use, make sure to light the coals and let them burn for a good 20—sometimes 30—minutes till they start to ash over and therefore become ready for cooking.
Charcoal needs technical time to light, and one of the biggest mistakes you can make with a charcoal grill is to not wait for the coals to ashen over. Black coals are coals that are not ready for cooking; they flare up and burn your food in no time.
How to Light Charcoal With Lighter Fluid
This method is relatively easy and is widely used among grillers all around the world. However, I wouldn’t necessarily recommend it for two reasons:
- If not handled properly, lighter fluid can be dangerous. People often use more than necessary, or add fuel inconsistently, which can cause fires. (Try to explain to the missus why you came back without eyebrows!)
- Lighter fluid has an unpleasant taste that the food will catch if the fluid you add to the charcoal doesn’t completely burn off. And, no matter how hard you try, it usually doesn’t.
With that out of the way, to light your coal using lighter fluid, follow these steps:
- Arrange the coals into a pyramid with a large base and smaller layers on top.
- Evenly pour the lighter fluid over the coals, but with caution.
- Leave the coals for about 30 seconds to absorb the lighter fluid.
- Use a long match or a grill lighter to light the coals at several spots.
- For your safety, don’t add lighter fluid once the coals are lit.
- Once the coals start to ash, break the pyramid and spread them out evenly.
- Place the grates on top of the lit charcoal and start the fun!
Related: How to Grill Without the Taste of Lighter Fluid
How to Light Charcoal With a Chimney Starter
This is the method I recommend, and most grilling authors and pitmasters concur with me. It’s safer, allows for proper ventilation and easy mobility, and, for long cooks, you can use it to fire up a second batch of coals and get ’em ready for throwing in the pit.
Follow these steps to light charcoal with a chimney:
- Add charcoal to the chimney. It can reach the brim but not overflow.
- Put any type of starter under the chimney. Some use newspapers, but you also can use things that burn slower, like paper cups or wood chips.
- Light whatever starter you used under the chimney.
- Leave it for 10-15 minutes.
- Slowly pour the coals into the grill once you see flames poking out of them.
- Once the coals start to ash, typically at the 20th to 30th minute, place the grates on top and start grilling.
Related: Are Chimney Starters Worth It?
How to Light Charcoal With an Electric Starter
An electric fire starter is an easy way to light your charcoal. It doesn’t require much skill or expertise. Here’s how you do it.
- Arrange the charcoal in the shape of a pyramid.
- Plug your starter and put its end to a spot at the center of the charcoal.
- Once you see sparks, pull the starter slightly away.
- Keep the firestarter pointed towards the same spot.
- When the fire begins, remove the starter.
- Once the coals start to ash, place the grates on top and start grilling!
Related: Chimney Starter or Electric Starter? (How to Decide)
How to Light Charcoal With Kindling
This method is simply building a fire to light your charcoal. It’s a little primitive, and it requires some effort and skill. Heck, I guess that’s why I go for it whenever there’s no chimney starter around!
Follow these steps to light your charcoal with kindling
- Place a layer of charcoal as a base for your fire.
- Put a couple of balled-up newspapers in the center.
- Add a thin layer of dry sticks in a crisscross pattern on the newspaper.
- Press the sticks over the newspaper to create a level surface.
- Add another layer of charcoal on top.
- Light the paper.
- With the first hint of ash in the charcoal, add more to build your fire.
- Once the coals start to ash, place the grates on top and start grilling!
Direct vs. Indirect Grilling
There are two cooking techniques to use when grilling with charcoal. Which one to apply depends on the thickness of the meat and the stage of cooking.
Direct-Heat Grilling
Direct-heat grilling is used for foods that require high cooking temperatures. As the name implies, this method applies heat directly to the food.
You light the coals, spread them out evenly under the grate, then cook your food directly above them. This provides you with direct, high heat for cooking thin cuts and searing thick cuts of meat.
It’s ideal for grilling food that cooks quickly, like steaks, burgers, fish fillets, and most types of vegetables.
If you choose the direct-heat method, follow these steps:
- Arrange your charcoal evenly under the grate.
- Let your grill preheat for 20 to 30 minutes before cooking.
- Once the coals turn white and ashy, place the food directly over them.
Indirect-Heat Grilling
With indirect-heat grilling, you don’t place your food directly over the burning charcoal.
This way of grilling is ideal for roasting and smoking foods, and works great for thicker cuts of meat, whole birds, and pretty much anything that won’t cook through in a dozen or so minutes.
Follow these steps to apply the indirect method:
- Light the charcoal.
- Configure your fire based on your preferences:
- For a two-zone fire, rake the coals over to the left and leave the right coal-free.
- For a three-zone fire, rake the coals to the left and right and leave the middle coal-free.
- For a circular fire, rake the coals to the edges of the kettle and create a coal-free zone circle in the middle.
- Whichever fire configuration you choose, place an aluminum drip pan under the indirect, coal-free cooking zone.
- Slow-cook your food over indirect heat with the lid on (and top vent cracked open).
What Foods Can You Grill With Charcoal?
You can grill pretty much anything with charcoal.
Among the most popular foods to be cooked on a charcoal grill are steaks, burgers, sausages, chicken breasts, salmon fillets, all the different types of veggies… you name it.
Just bear in mind that the temperature—and the cooking method—will vary from one type of food to the other.
For instance, use high, direct heat for cooking any piece of food that cooks relatively quickly. This includes steaks, burgers, chops, filets, veg, and such. Only expose thick cuts of meat and whole birds or whole piglets to direct heat to sear them.
Gentle, indirect heat is ideal for grilling foods that require thorough cooking, such as sausages, birds, piglets, briskets, racks of ribs. Think big, thick cuts that’ll burn if cooked over high heat. Additionally, medium heat is perfect for marinated foods that would otherwise burn at high temperatures.
When in doubt, build a fire with at least two zones: one direct, the other indirect. You will always have choice of cooking method and cooking temperature, and having choice is what can make or break your grilled meats and veg.
How to Prep Food for Charcoal Grilling
To get the best results with charcoal grilling, you need to prepare the food properly before you slap it on the grate.
Defrost, defrost, defrost:
For starters, never grill your food from frozen. Take the time to thaw out your meat in the fridge—even if it takes 2-3 days—before grilling. I guarantee you you will be rewarded generously.
Of course, you can take a shortcut and defrost your steaks or burgers in ice water or in the microwave. But then they probably won’t cook as evenly.
Besides, defrosted in the microwave, the meat will be rather rubbery. The price you pay for convenience is too high; plan ahead and I’m telling you you won’t be sorry.
Bring the meat to room temperature first:
Remove the meat and veg from the fridge 15-20 minutes before cooking. By bringing them to room temperature, you’re making sure that they cook quickly and evenly—and don’t dry out.
Season the meat right before cooking:
Season the meat before placing it on the grill.
The most basic type of seasoning is a mix of kosher salt and black pepper. Of course, these days you can choose from all kinds of rubs and seasonings to your taste.
Or dry-brine it 1-2 hours in advance:
To dry-brine meat, take it out of the fridge 1-2 hours before cooking, season it liberally with salt and pepper, and then put it back in.
The salt crystals draw the juices out of the meat through the process of osmosis. Then, they dissolve in it, forming a salty brine that gets reabsorbed right back.
The result is a juicy, deeply flavorsome meat that tastes better than that at your favorite steakhouse. Just don’t overdo it; I once ruined a pair of otherwise good steaks by dry-brining them overnight.
They turned out so rubbery the dog wouldn’t eat them!
How to Grill With Charcoal: Step-by-Step Guide
Grilling with charcoal is not a hard task.
However, if you’re not cautious enough, this fun activity can be a hazard. If you’re a newbie, allow me and the Barbehow team to walk you through the process.
Light the Coals
Light the charcoal any way you choose: lighter fluid, chimney starter, electric firestarter, or plain old kindling.
Whether you arrange the coals in the pit or pour them in the chimney starter depends on which ignition method you choose for the grill.
Configure Your Cooking Zones
A charcoal kettle gives you more control over the cooking temperature than you think.
Yes, gas and pellet grills have knobs. But a charcoal grill, at least in this griller’s book, is better: it’s an empty pit that gives you choice over how to rake the coals in a way that best suits your cooking needs.
Don’t get me wrong; it is always an option to distribute the coals evenly and cook your food over the same temperature no matter where it sits on the grate. But once you cook over a multi-zone fire, you cannot go back.
A multi-zone fire gives you superior control over the grilling temperature—and it is control over the grilling temperature that allows you to cook your meats and veg to perfection, no matter how thick they’re cut or how liberally they’re marinated.
So here’s how to build one from the very first time you cook over charcoal.
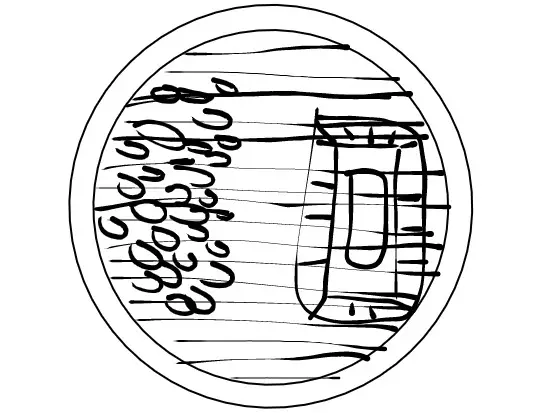
To build a two-zone fire, rake the coals over to one side and leave the other side coal-free. The left side gives you a direct, high-heat cooking zone; the right side gives you an indirect, medium-heat cooking zone.

To build a three-zone fire, rake the coals to the left and right, leaving the middle of the grill coal-free. The left and right give you direct heat; the middle gives you indirect heat.
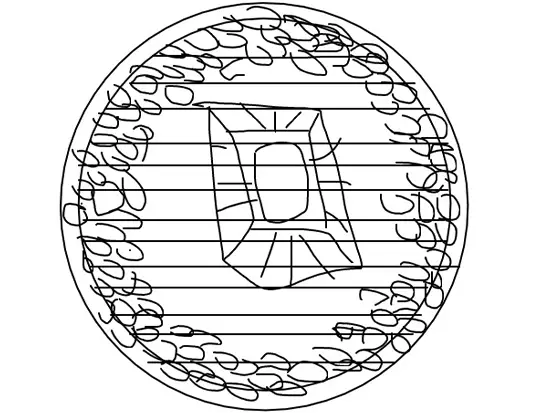
To build a circular fire, rake the coals to the edges of the kettle and create a coal-free zone circle in the middle.
When grilling over direct heat, do so with the lid off. Conversely, when you’re grilling over indirect heat, cook with the lid on. Make a note of this, and you’ll be able to prepare any cut of meat to perfection.
Adjust the Vents
You can adjust the temperature of your grill using the vents. Open vents allow for more oxygen, which increases the fire, thus raising the temperature.
Close the top vents, but not all the way, and keep the bottom ones open to slow the combustion process and give a chance for flavor-filled smoke to gather inside your grill.
Only close the vents fully when you want to suffocate the fire and shut down your charcoal grill. Fire is like a living, breathing creature; it needs oxygen or it’ll die.
Grill the Meat
Now comes the best part.
All you need to do is lay your meat on the grill and let it sizzle.
At this point, you should have the bottom vents open and the top ones nearly closed. When in doubt:
- Cook thin cuts of meat, or sear thick cuts of meat briefly, over direct heat, lid-off.
- Cook thick cuts of meat and large pieces of veg over indirect heat, lid-on.
No matter which cooking method you use, always leave the food to cook uninterrupted for a few minutes per side. Don’t turn it, don’t press down on it, and don’t poke it; let the heat work its magic.
There are several ways to make sure your meat is ready.
For example, you can use a food thermometer to test its internal temperature. This is the only reliable and accurate way to test meat for doneness.
Alternatively, you cut a little piece to check if the meat is thoroughly cooked. A few other tips and tricks apply, and we’ve written about these in greater detail for steak, for chicken, and for brats. I encourage you to go on and take a gander.
When your meat is ready, move it out of the grill and close the lid.
It’s important to let the meat rest for 3 to 10 minutes before carving, plating, and serving to allow it to finish cooking and give the fats and juices the opportunity to settle in their rightful place.
A steak or burger cut prematurely is one whose fats and juices drip down on the plate. (And it’s in the mouth of the eater where you want them to be!)
Turn Off Your Grill
Close the lid and shut the vents. Leave the grill to cool for an hour or two before cleaning it.
Make sure you remove all the ash and leave only the unburned charcoal. Also, be sure to cover your grill to protect it from direct sunlight, snow, rain, or wind.
How to Clean Your Charcoal Grill
Although most grilling grates are designed to prevent sticking, sometimes, sticking happens. With that in mind, you need to make sure that there’s nothing on your grates.
I advise you to clean the grates with a brush after they cool. You can also wear protective gloves to protect your hands from carbon.
One of the hardest things to do when you’re grilling with charcoal for the first time is to empty the ash catcher. It can be a fire hazard if emptied while still warm.
You should wait for at least 12 hours to make sure the ash catcher is totally cooled. You also need to be absolutely sure there’s no sign of burning in the catcher before you empty it.
How to Choose Your Charcoal?
There’s charcoal. And then, there’s charcoal.
You would think that there couldn’t possibly be much of a difference between one bag of charcoal in the outdoor cooking section at the hardware store and the other, but you’d be wrong.
There are two types of charcoal to put in your grill: lump charcoal and charcoal briquettes. Seasoned cooks opt for the former because it’s more natural. Beginner cooks go for the latter because it’s easier to use.
But, as we’re about to find out, there’s more to selecting charcoal than deciding on which type you want to use.
Lump Charcoal
Lump charcoal is made from trees, logs, or pieces of wood burned in a kiln in the absence of oxygen. Many consider it a “natural” fuel for their charcoal grill, and they are mostly right.
Some bags of lump charcoal are about as natural as they get. They’re basically oak, hickory, or mesquite burnt in a kiln, ready for you to light up and cook over.
Others…
Well, let’s just say you might be cooking your steaks over the wood floor of an abandoned house in Detroit!
When shopping for lump charcoal, look for odd-shaped coals. Uniform-shaped coals should raise eyebrows. They typically come from scrap flooring and old furniture—not necessarily the type of firewood you would want to be cooking your food over.
Advantages of lump charcoal
- Lump charcoal burns hotter; it’s great for direct grilling.
- It’s more natural than charcoal briquettes are.
Disadvantages of lump charcoal
- Lump charcoal burns faster and loses heat after 20-30 minutes.
- Long cooks over lump charcoal require more frequent top-ups.
Briquettes
Charcoal briquettes were invented by American industrialist Henry Ford in the 1920s, when The Ford Motor Company factory found itself overwhelmed with sawdust after having produced a million Model Ts in a year.
Ford’s idea was simple—turn that sawdust into cooking fuel for the American homeover—and yet difficult to execute at the time. So Ford enlisted the help of none other than Thomas Edison to design the first factory for charcoal briquettes in the world.
The rest, as they say, is history.
Today, charcoal briquettes remain one of the most (if not the most) popular grilling fuel for beginner cooks. The small, uniform pieces of charcoal are made with coal dust, trimmings from furniture, borax, and/or petroleum binders.
In recent years, petroleum-free charcoal briquettes have been brought to the market. These use other binders, such as vegetable starch, and contain as few non-natural ingredients as possible. If and when you have the option, I recommend that you go for them, even if only for reasons of purity.
Advantages of briquettes
- The uniform size makes it a standard unit of fuel, which facilitates controlling the size of the fire.
- This charcoal is ideally used with foods that require fast cooking such as steaks and fish.
Disadvantages of briquettes
- Briquettes burn slower and not as hot as lump charcoal.
- Their ingredients list is not something every griller agrees with.
Knowing all of this, the good news is that you can still capture the benefits of the two types of charcoal by building a mixed fire with briquettes and lumps.
This way, you get the heat of the lump from an even fire that can keep burning (and cooking your food) for a long time. Also, natural briquettes are becoming increasingly easy to find.
How Much Charcoal to Use?
When it comes to the amount of charcoal to use, there are several factors to consider, including the required temperature, the food you’re cooking, and the weather.
The bottom line is the more charcoal, the hotter the fire. Therefore, the amount of charcoal to use depends on the temperature you want to reach.
For example, slow-cooking foods that require a relatively low temperature, such as hotdogs and burgers, don’t need much coal. When grilling such foods, only one layer of charcoal across the bottom of the grill will do.
On the other hand, you’ll need two or three layers of charcoal to sear foods that require higher temperatures, such as steak.
Moreover, the weather plays a role in determining the amount of charcoal to use. You’ll need more charcoal than usual on cold, windy, or rainy days to keep your fire going.
Tips and Tricks for Grilling With Charcoal
- Never use your charcoal grill indoors. If coal burns in an enclosed area, it produces carbon monoxide, which is colorless and odorless but can be fatal.
- Wear protective gloves when transferring the charcoal or removing the grates; you’d be surprised by how hot the metal gets.
- Keep your vents opened or cracked during grilling. If you close all your vents, the fire dies from a lack of oxygen.
- Don’t use moist charcoal from the start. You can add it later onto hot coal, which will be able to vaporize the moisture.
- Built-up ash can suffocate the fire.
- Keep the lid of your grill down as long as you can to trap the smokey flavor in your food. When grilling with indirect heat, grill with the lid down.
- Use a flavorless cooking oil with a high smoke point on your food to brown it evenly and prevent it from sticking to the grates.
- Don’t use water to extinguish ash while still on the grill. The reaction between water and ash produces potassium and sodium oxides, which cause corrosion.
- You can add some wood chips to your fire to infuse natural wood smoke flavors into your fish, veggies, or meat.
- The shape and size of your grill determine the amount of charcoal to use.
- For low temperatures for smoking and slow cooking, use a small amount of charcoal.
- You can add coal about every 30 minutes to keep the fire burning for a long time. A chimney starter can help you light them up in advance and make sure they’re hot enough to cook over.
- Season meat with salt and pepper immediately before grilling it. Or dry-brine it by salting it liberally and refrigerating it for 1-2 hours before you throw it on the grill.
The Bottom Line
While it might seem intimidating, grilling with charcoal for the first time is actually quite easy. All you have to do is follow certain guidelines, take some precautions, and you’re good to go.
Much of the grilling experience depends on your choices. You can pick between lump charcoal and briquettes, direct and indirect heat, or the different firestarters. The choices depend on the food you’re grilling and the temperature you require.
No matter what you choose, grilling with charcoal is fun. If you follow the steps in this guide, we guarantee you’d enjoy every part of it.

Great article thank you