You’re prepping for grilling and smoking season. And, for reasons I can empathize with, you’re not overly keen on buying pre-seasoned wood from a supplier.
The good news is that you can get freshly cut wood and dry it yourself at home. If you want something done right, as the old saying goes, do it yourself. All it takes is to learn exactly how to do it.
Before we get to the two methods for drying wood in the confines of your home, I’d like to address a question that some of you may be asking:
“Sammy,” I hear you saying, “why dry my wood in the first place?” A good question, thank you for raising, and one worthy of a brief interlude before we get to the meat of it.
To the novice griller or meat smoker, it may seem logical to cut down a tree, split the wood, and then throw it in the pit or firebox and get cooking. But the seasoned cook, who’s done this and that, knows better.
Freshly-cut wood has lots of sap and too much moisture. For this reason, it smolders with a dirty, heavy smoke that can give a bad smell and taste to even the finest of meats, cheeses, and vegetables.
The high moisture content in freshly cut wood, you see, causes it to burn unevenly. Much of the heat—the energy of the fire—goes not to cooking your food, but to evaporating the moisture from the wood, along with the terpenes in it.
This results in A) unevenly cooked food and B) one with undesirable flavors imparted to it. As one of my cousins put it, “I wonder why my brisket ended up smelling like cigarette buds.” Yikes!
Try all you want, but you won’t be able to mask these flavors with black pepper or BBQ sauce. They come from the fragrant compounds abundantly present in freshly-cut wood.
How to Dry Wood
When it comes to drying firewood, two methods have stood the test of time: air-drying and kiln-drying. One requires ingenuity, the other equipment. One is slow, the other quick. Since you can’t have the pie and eat it too, it’s all a matter of trade-offs.
The Air-Drying Method
Air-drying is the more traditional method of the two. As the name implies, the wood is cut, split, and then left to dry out in the sun, naturally, until most of the moisture in it has evaporated.
Step 1: Begin drying late spring/early summer.
With air-drying, local climate conditions have a major impact on the drying process.
For quick and consistent results, I suggest starting the drying process sometime in late spring or early summer, when the sun is out more. Air-drying wood during the fall and winter months also means your wood will take in extra moisture from the humidity.
Step 2: Cut and split the wood into small pieces.
By cutting your wood up into smaller chunks before drying, air can penetrate its surface faster, which makes the drying process quicker.
Make sure you’re using a sharp axe that cuts through the wood instead of bouncing off of it. Wear some safety equipment while cutting; I’ve had a splinter end up in my eye and, for a while, I got Ms. Steen worried as the sight wasn’t pretty.
Or save yourself the hassle by buying pre-cut, unseasoned firewood.
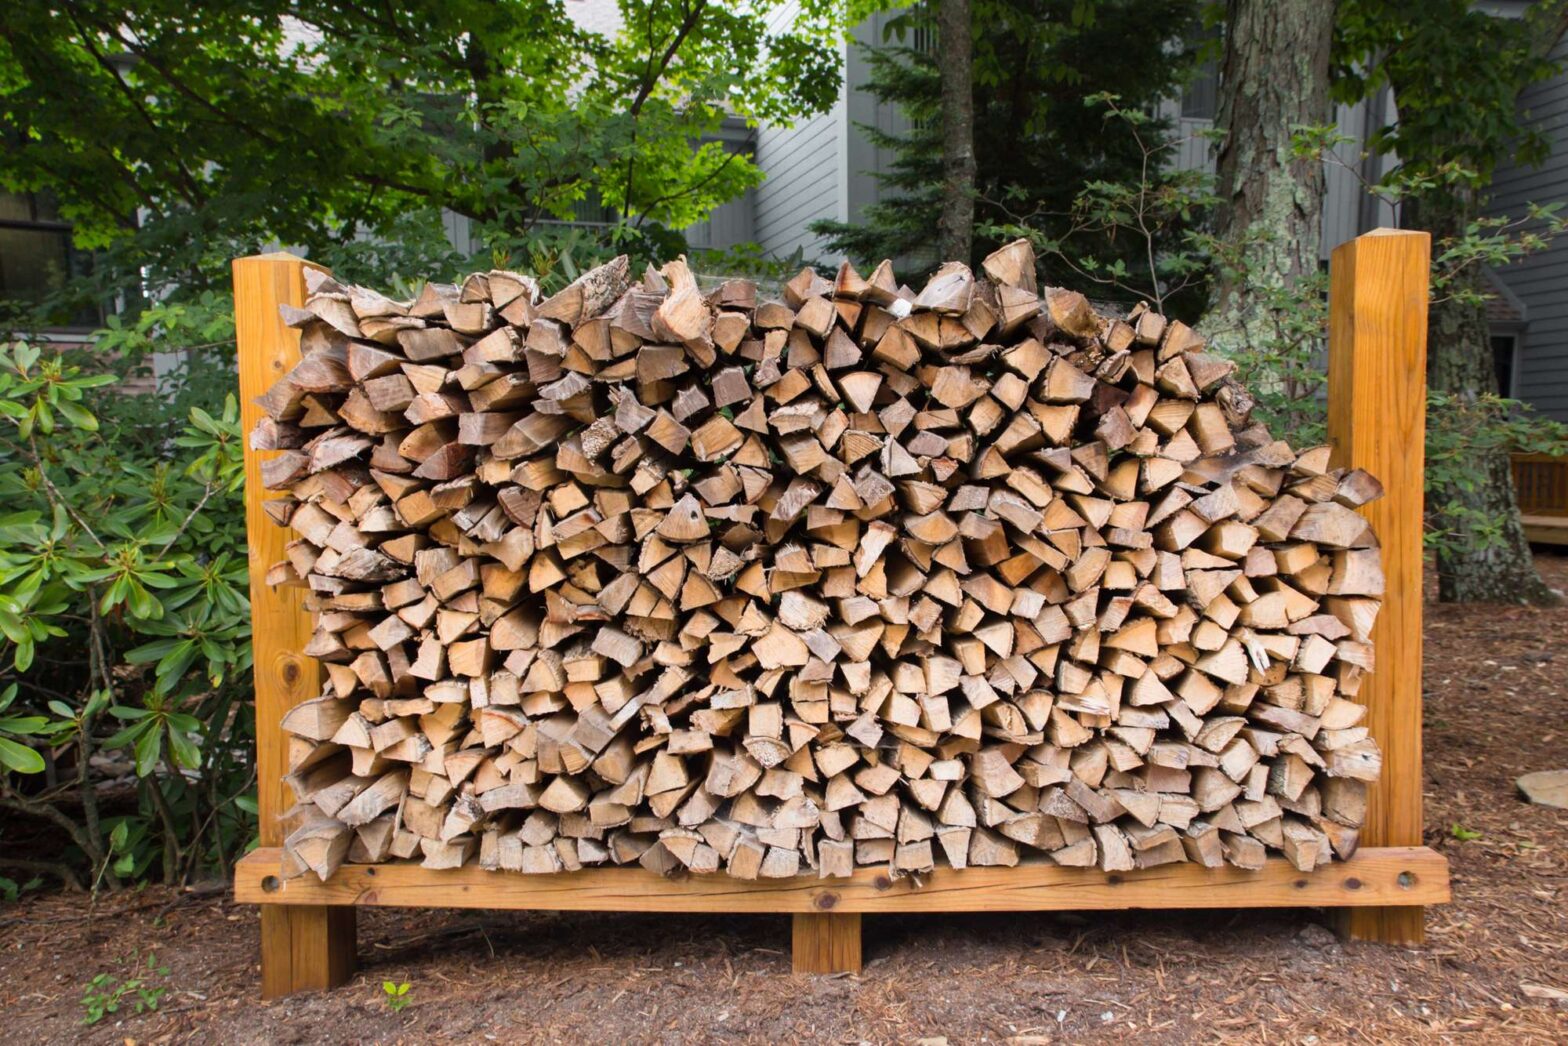
Step 3: Set up your raised platform.
Once you’ve cut up your wood, you want to set up a raised structure where your wood will complete the drying process. If you place your wood directly on the ground, you’re cutting off air circulation.
The raised platform will prevent moisture from building up under your wood, promoting even and thorough drying. Sounds fancy, I know. In reality, an old table should work just fine. A wired shelf is even better as it can offer better airflow.
Step 4: Stack your wood in piles
Place your wood on the raised structure by stacking it into piles.
The idea is to stack them in rows, one on top of the other. But you don’t want your pile too high; it can become unstable and fall over.
Keep your wood in single stacks to provide it with even ventilation. Try leaving as much space as you can between pieces to allow your wood to dry evenly. What you want to avoid is the buildup of moisture.
Step 5: Leave it alone now.
Who would have known that the secret ingredient to properly dried firewood is patience?
Once you’ve completed steps 1-4, the next step is easy: Just leave the wood alone to dry naturally. The process may take between 3-6 months.
How quickly your wood dries using this method depends on several factors, namely: the wood’s starting moisture level, the thickness, the density, and the type of wood being dried.
Try to avoid disturbing or moving the wood too much unless you need to protect it from rain or other counterproductive environmental conditions.
Step 6: Measure your wood’s moisture content.
As your wood dries, monitoring its progress by measuring its moisture content is important. A handy tool for doing this is a wood moisture meter. To use this device, just stick the prongs into your wood, and it will measure the moisture content.
For fresh wood, you will see a reading of at least 100%, meaning half of the weight of the wood is water. Now, a freshly cut tree in Louisiana can measure as much as 200% moisture content, which means there’s twice as much water as there’s wood mass. (Imagine throwing that in the fire…)
Once your wood’s moisture falls to less than 20%, it’s ready to go in your grill or smoker. However, you want to avoid over-drying your wood. Otherwise, it will burn up too fast and won’t create enough smoke to benefit your food.
The Kiln Method
The kiln-drying method is more of a controlled process, requiring you to put wood inside a heated chamber.
Step 1: Arrange your wood inside your kiln.
Set your wood in your drying chamber (or kiln). Depending on the type of kiln you’re using, you may have to stack your wood along its walls or put it in allocated spaces.
Step 2: Set the desired temperature.
The next step is setting the proper temperature. Again, you want to consult your kiln’s manual for the recommended temperatures. This will mostly depend on the kind of wood you’re drying.
Overall, this method takes about 11 days to dry wood. The higher you set the temperature, the faster you will dry out the wood. But, once again, be careful not to dry it too much.
If you’re planning a slow smoke, you may want to set your kiln’s temperature lower that way. Your wood will burn slower and longer. If done properly, you’ll have good wood that will burn longer without the need for high heat.
Step 3: Adjust the ventilation.
It’s important to turn on your kiln’s ventilation system. If you don’t turn the fan on, your wood will not dry evenly.
Step 4: Maintain your fuel supply.
Always make sure your fuel supply remains constant. Depending on the type of kiln you have, you can add either oil, firewood, or coal in the provided slot. Consult your manual to learn about proper fuel loading procedures.
Step 5: Turn off the kiln.
Once the recommended drying time has elapsed, you need to switch off your kiln and fully open its air vents to allow hot air to escape. This generally takes between 4-6 hours.
But, whatever you do, please don’t try to open the kiln before the wood has cooled down, since this can be a very hazardous safety risk. Opening the kiln prematurely can result in getting hit with a burst of hot air. Consult your kiln’s cooling instructions to learn how to open your kiln safely.
Step 6: Transfer the wood to storage.
After your wood has cooled down, you should be able to safely move it to your desired storage location. Open sheds and other forms of dry shelter are the best places to store dried wood.
That said, if you have wet weather conditions, you should cover your wood with a tarp to prevent direct moisture transference.
Pros and Cons of Air- and Kiln-Drying
Both drying methods have their up and downs.
The air-drying process is simpler and does not require a lot of supervision. However, it takes much longer.
The kiln method yields seasoned wood faster but requires closer supervision—and a good kiln can be expensive. Besides, exposing your wood to higher temperatures too quickly may make it overly dry, which can also impact your cooking experience and outcomes.
How to Tell If the Wood is Sufficiently Dried?
You can also check the following conditions to know if your wood is sufficiently dry.
Weight: Wood that feels lighter will have less moisture. If your wood still feels a bit heavy, it likely has too much moisture.
Color: Fresh wood will have a shinier, tan color. It also tends to begin losing shine and color over time. Wood that’s lightly colored and slightly gray shows signs that the moisture within has been evaporated.
Sound: You can also check a piece of wood’s dryness by thumping it using your thumb. Dry wood often has a deep sound, while wet wood gives off a dull sound.
Bark: If you notice the bark begin falling off or a few cracks in it, this means your wood is dry or getting dryer.
Final Thoughts
As you can see, drying your wood correctly before smoking is super important. Too much moisture can ruin your food, while too little can also ruin your food’s flavor and burn your wood too quickly.
Last, it’s a good idea to invest in a wood moisture meter to achieve the best results.
Hi there, once your wood is dried/seasoned sufficiently how do you store to prevent over drying of larger quantities of wood. I have access to a whole red oak tree.
Hi, David! Kind of you to drop by and ask such a great question!
Now, when it comes to firewood, you might not need to fret too much about it overdrying, especially under normal circumstances. Firewood that’s dried out a little too much can burn up mighty quick, but I reckon that green wood could pose a bigger problem, because it just doesn’t burn as clean.
To keep your firewood fit for use, store it outdoors in a spot where the sun can shine on it, with plenty of wind for ventilation. And if your moisture meter shows around 10 to 20% moisture, I’d say you’re good to go. To prevent overdrying — that is, the moisture level dropping below 10% — don’t split the logs before storing them and stack them up a little tighter to hamper airflow. Just keep them off the ground so moisture doesn’t seep up into the logs and cause other problems.
Sammy