Just purchased a smoker and excited about using it? Well, you’ve come to the right place!
Smoking is an incredible cooking style that requires much patience, but the results are undoubtedly worth it. So, if you’re looking forward to trying it out for the first time, we cover all the basics for you below.
In this guide, you will learn how to smoke meat for the first time. This includes what cuts are best to throw in the smoker, what wood to use, and how to build a fire.
That—along with the answers to many more questions you may and inevitably will have—below.
Take a gander.
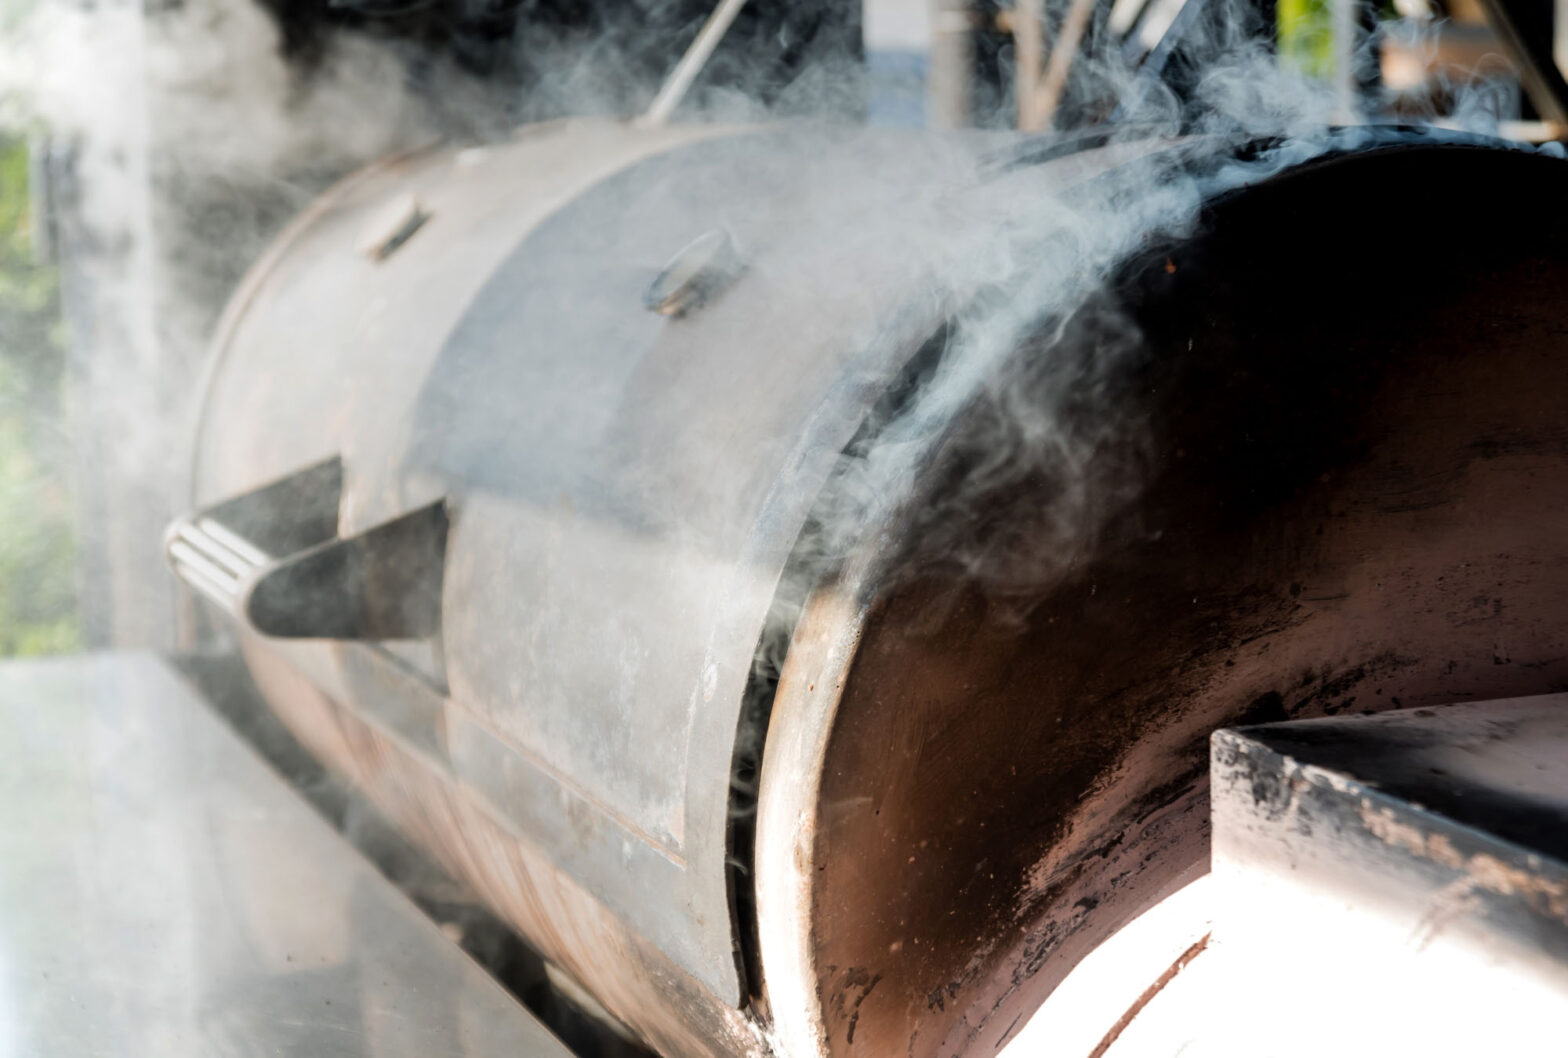
The Crash Course
Smoking is a method for cooking meat low and slow:
- “Low” because you want to keep the temperature inside your cooking chamber between 225°F and 275°F.
- “Slow” because it can take hours, sometimes a day of smoking, to cook a big bird or a large slab of meat to doneness.
You need a good cut of meat, the right technique, and a great deal of humility, and a formidable amount of patience.
We will cover cuts and technique in this article. Humility comes with trial and error, and getting things wrong when you think you had everything right. Patience… you learn with time. (Ironically, the less time you’ve left, the more patient you become.)
The best cuts of meat for smoking are big, juicy, and plentiful in collagen. Collagen is that tough connective tissue that gives smoked meat (and stewed meat) is tenderness.
Grill it quickly, and it will come out tough and dry. Smoke it slowly, and, when its temperature reaches 160°F (70°C), collagen melts into gelatin.
The meat smoker, in other words, is an alchemist who takes an otherwise tough cut of meat—and turns it into the juiciest, most tender meat on the table infused with the formidable aromas and wonderful flavors of smoldering wood.
Your choice of wood is as mission-critical as your choice of meat.
Some woods give off thick, heavy smoke that needs rich, fatty meat like beef, pork, and game to stand up to it. Others give off mild, pleasant, sometimes sweet smoke that complements hams, birds, and fish.
Choose your would as you would choose your spices. At first, smoke your meats with the moderate kinds of wood—not too strong, not too mellow—because they are the most forgiving to the mistakes you’ll inevitably make.
Then go wild. Mix local woods. Try rare, exotic woods from other continents. Meat smoking is more than just a way of putting food on the table. It is the calling of our ancestors and a way to travel time and distance through your tastebuds; savor it.
9 Great Cuts of Meat for Smoking
The golden rule of picking out suitable meat is to avoid lean cuts. Not only are they expensive, but the long process of smoking will just ruin them.
In other words, it’s much better to go for a slice of meat that’s tough, and plentiful in collagen and muscles. Such cuts withstand getting smoked for hours until they become nice and tender.
With that in mind, this section includes the best nine cuts perfect for beginner smokers.
1. Pork Butt
Unlike what the name suggests, pork butt refers to a pig’s upper shoulder. It’s an area packed with strong muscles and tendons, making it a perfect first choice for smoking.
Typically, each pound of pork butt equals around one and a half hours of smoking. This allows enough time for the dense tissues to become softer, resulting in a tender cut of meat.
2. Pork Ribs
Pork ribs come from the underbelly region of a pig. They may not be as meaty as beef ribs, but the fat in this cut—especially when smoked—renders them more flavorsome and delicious.
Since pork ribs tend to be quite large, they’ll need to cook side-up for four hours at 225॰F. You can rub the meat with brown sugar mid-cooking before turning it over for another few hours.
3. Pork Shoulder
The triangular cut from a pig’s foreleg is known as pork shoulder. As this area is exercised a lot, the meat is low in fat and packed with flavor. It’s another ideal option for slow, first-time smoking.
Pork shoulder is often confused with pork butt, but the former has more tissue in it, making it juicier when cooked right. Smoking pork shoulder takes around four hours.
4. Baby Back Ribs
One of the most desired and easiest to cook rib cuts is baby backs.
As opposed to standard pork ribs, baby back ribs are cut from a pig’s backbone and tend to have less meat.
Not just that, but baby back ribs cook in less time than spare pork ribs. It normally takes five hours to smoke back ribs. To prevent them from being too chewy don’t leave them for too long.
5. Beef Prime Ribs
Prime beef ribs are the cut from a cow’s sixth to twelfth rib, where the loin and chock meet. They’re often mistaken for ribeye since they both share the same meat-to-fat ratio, with the exception that ribeye is better grilled.
Beef ribs, on the other hand, are more expensive and marble quicker under smoke. Each pound needs around 40 minutes in the smoker. Buttery garlic rubs pair well with prime ribs too.
6. Beef Cheeks
Since cows are grazing animals, their cheek muscles are stronger than most. As such, beef cheeks are a tough cut of meat that’s both perfect for smoking and great for beginners to try out.
Beef cheeks should be smoked on a low setting for 30 minutes beforehand to boost their flavor profile. Then, keep them in the smoker for three hours at 300°F. Make sure to braise them before re-smoking for two extra hours.
7. Beef Brisket
Brisket is the lower chest region of a cow and it’s the largest cut of meat on our list. In other words, it’ll take a lot of patience and time to smoke it, yet it’s still fairly easy for beginners to try.
Beef briskets cook at 225°F and can take from 10 to 20 hours to fully tenderize.
The good news?
They’re notorious for retaining their shape in the smoker and being sliced easily.
8. Lamb Shanks
Lamb shanks, unlike lamb legs, are closer to a lamb’s upper sirloin, meaning, they’re fatter and meatier. Smoking lamb shanks helps melt the fat and boost the meat’s flavor.
That said, you should braise lamb shanks in a liquid of your choice before putting them in a smoker. This cut takes around three to four hours to cook at 375°F.
9. Lamb Shoulder
Similar to pork butt, a lamb’s shoulder is packed with muscle tissue and fat. It’s a good option for beginner smokers because cooking lam shoulders is pretty straightforward.
A cut of seven pounds will take no more than four hours in the smoker at 250°F to 300°F. Just remember to spray the meat with a marinating liquid every 20 to 30 minutes to keep it from toughening up.
How to Build a Fire in the Smoker
A non-electric smoker many seem intimidating to the beginner cook. However, once you get the hang of it, building the fire and controlling the temperature become second nature.
In this section, we take you through five simple steps that show you how to build fire in a smoker.
1. Clean the Firebox
You don’t need to do this the first time you fire up your smoker because the firebox isn’t dirty. That said, we cannot create a guide for beginners without mentioning this step.
Clean the firebox before each step. Pick up the ash and the charcoal remnants with your shovel and put them in a metal bucket. Only do this after you’ve put out the fire—and let the firebox cool down for a day or two.
2. Load the Firebox With Coals
With the shovel again, add enough coals to take up 1/3 (for lower cooking temperatures) to 1/2 (for higher temperatures) of the grate in your smoker’s firebox, spreading them out evenly.
Don’t overload your firebox with coals. Remember, you’re not grilling food, you’re smoking it. And smoking is a cooking method with which you prepare your food low and slow.
3. Ignite the Coals
Dousing the coals in lighter fluid is a no-no. It can spoil an otherwise successful cook by making the brisket or pork butt reek of gasoline. Try as you might, you won’t be able to get rid of the flavor.
Some meat smokers use a chimney starter to light their coals in advance. Others will use kindling or an electric fire starter to do so gradually. A propane torch—a handy tool to keep in the shed—is always an option.
4. Wait Till the Coals Stop Smoking
Yes, it’s called smoking meat. But the smoke, as you already know by now, doesn’t come from the charcoal.
Before you move on to the next step, wait 15-20 minutes for the coals to stop smoking as much and start to ashen over. When they start to glow orange on the inside and turn white and ashy on the outside, the coals are ready to cook over.
Spread them out nice and even with your shovel. You don’t want to leave them piled up in the middle or on one side as it can cause hot and cold spots in your smoker.
5. Add the Wood
Now comes our favorite part of building a fire: adding the wood, adding the wood, the very source of the smoky aroma and flavor we do it all for.
Exactly how much wood to add depends on the cooking time.
For shorter cooks, you can add a couple of large pieces of wood so you don’t have to fiddle with the fire too much. For longer cooks, add chunks or chips of wood and top up every 45-60 minutes.
We explain what kind of wood is best when smoking meat in the next section. For now, just know that different wood will result in various flavors. If you enjoy rich, smoked meat, for example, then oak and hickory will be great options.
6. Maintain the Fire as You Go
Now that your fire is up and running, you’ll need to keep a regular eye on it while your meat slowly cooks inside. The bigger the cut, the more you have to frequent the fire to make sure that it’s still going strong.
You’ll be adding more pieces of wood every 45-60 minutes. It’s tempting to open the firebox and poke the coal around now and then, but it can lead to temperature spikes that dry out your meat and make it tough.
Remember to always use heat-resistant gloves. Especially as a beginner, it’s easy to burn your hand on the firebox door if you get overwhelmed or distracted.
7. Avoid Spiking the Temperatures
As we’ve said before, smoking is a low and slow cooking process.
While it sounds tempting to keep checking on your meat, opening and closing the smoker’s lid will only tamper with the temperature you’ve worked so hard to perfect.
So, for instance, avoid adding unlit charcoal to coal since that may suffocate the fire or cause the temperatures to drop drastically. If you must do so, ignite them in the chimney before putting them in the charcoal basket.
What Kind of Wood to Use
Wood, whether you prefer it in chips, chunks, or logs, is an integral part of creating a rich, smoky flavor.
Only use hardwoods. Softwoods smolder with chemicals that make the meat or cheese taste harsh and bitter. Some of them can be toxic, so you can irritate the hell out of your lungs by inhaling their smoke or poison yourself and the family with the brisket.
Knowing that, below you’ll find what kind of wood to smoke meat with for the first time and how to properly add it to your smoker.
Choosing the Smoking Wood
Use seasoned wood. Seasoned wood is wood that has been dried for a few months to a couple of years, losing much of its moisture as a result.
Along with the moisture evaporate the chemicals that make the smoke heavy and its flavor overly strong. Seasoned wood smokes with a thin stream of bluish smoke; green wood gives off thick and gray smoke that you don’t want to be caressing your meat.
Here’s a quick list of ideal wood options for first-timers to use:
- Oak burns hot and slow, has a strong but not too strong of a flavor, and is ideal for briskets, beef ribs, and sausage.
- Hickory, strong-flavored and slow to burn, works wonders on pork shoulders and ribs.
- Mesquite smolders a lot, with an intense flavor that warrants fatty, aromatic meat like beef and lamb.
- Maple has a slight, syrupy sweetness to it. Its mildness makes it a good fit for whole chicks, turkeys, and game birds.
- Pecan has a nuttiness to it that goes wonderfully with pork. But you can also pair it with hickory or mesquite for beef.
- Fruit woods—think apple, cherry, peach—pair well with poultry and fish. Pair them with oak or hickory for smoking pork.
When in doubt, start with oak. It’s not too strong, nor too mild, making it a forgiving choice of wood for the beginner. It tolerates mistakes and haste in cooking.
Adding the Wood
Depending on the kind of smoker you have, the way you add the wood will differ.
For example, if you’re smoking meat in your charcoal kettle or gas grill, you will probably be using wood chips and pre-soaking them before wrapping them in poked aluminum foil or putting them in the smoker box.
On the other hand, you will use chunks or logs when loading up the firebox in your barrel, bullet, or cabinet smoker. The larger the piece of wood, the less sense it makes to smoke it—smoking slows down the combustion of smaller pieces of wood so that they smolder more and burn less.
How to Position the Meat in Smoker
When it comes to positioning meat in your smoker, common sense applies.
As a general rule of thumb, the less you fool around with the meat and the fire, the better the outcome—provided you’ve seasoned the meat well and built the fire properly.
Whole birds, whether chickens, turkeys, or game birds, should be positioned breast-side down on the cooking grate. They don’t need to be rotated or turned over during the cook.
Brisket is best smoked fat side up. Some folks flip their brisket halfway through cooking, others leave it as is. Flipping prevents one side from drying out, but it also leads to loss of fats and juices.
If you’re using an electric smoker, then you’re in luck. They typically come with a stainless steel grill rack that you can directly put the meat on. You also have the option to remove it, just remember not to place the cut where the heat is high.
Another option for beginner smokers is to place their meat in a shallow, aluminum tray. Since you can’t keep checking on your meat while it cooks, this method reduces the odds of the cut smoking too quickly.
When smoking in a charcoal kettle, gas grill, or barrel smoker, add a tray of water next to your meat. It’s hard to get the temperatures right at first, so this helps adjust the heat so the cut cooks evenly.
(On a bullet or cabinet smoker, the water pan’s non-negotiable. It holds on to heat and evens out the cooking temperature.)
Should You Flip or Rotate Your Meat in the Smoker?
As we’ve mentioned before, flipping your meat too often will affect the internal temperatures of your smoker. This results in the uneven smoking of your cut where some parts end up more well-done than others.
The size of the cut and the kind of smoker you have are among the few factors that contribute to how often you should flip or rotate meat in a smoker.
As a rule of thumb, the hottest part of your smoker is the one that’s close to, or directly under, the firebox. You’ll need to avoid keeping your meat there since smoking requires low heat. Instead, place the water pan there.
With small and thin cuts, they don’t take much time and often require no flipping at all. Bigger and fattier cuts of meat, on the other hand, can sometimes benefit from one or two flips mid-cooking.
Tip: limit the flipping and rotating to whenever you open the lid to add more charcoal or wood.
When to Wrap the Meat in Aluminum or Butcher Paper
The decision to wrap your cut in aluminum or butcher paper comes down to how you like your meat.
Unwrapped meat turns out dry and crispy. (For many, too dry and crispy.) Wrapped meat comes out tender and juicy, but with less of a bark.
The aluminum foil keeps the moisture—and retains the heat—inside. So a brisket that’s wrapped is one that typically stalls less and cooks quicker. When the internal temperature of the meat reaches 170°F, +/- 5°F, pull it out, wrap it up, put it back in.
Related: Your Brisket Stalled. Now What?
If you’re a fan of crunchier meat slices, then butcher paper is the way to go. This red, breathable paper allows moisture to escape. It soaks up any liquid the cut has, making room for smoke to reach it.
Similar to foil, wrap your meat in butcher paper when it reaches 170°F, +/- 5°F. Just make sure not to do so too tightly as the paper may tear, resulting in steam escaping.
Telling When the Meat Is Done
Every meat smoker needs a good meat thermometer.
They come in all shapes and forms and with all sorts of bells and whistles.
But all you really need is an instant-read meat thermometer with a probe that’s long enough to stick into the thickest meats and a dial you won’t have trouble reading in the heat of cooking.
The internal temperature of the meat is the only reliable indicator for its doneness because it is heat that:
- Kills the bacteria and parasites in the meat, making it safe for you and the friends and family members on the table;
- Turns the tough collagen in the meat into juicy, dripping gelatin that makes the heart sing and the mouth water.
Different recipes tell you to pull the meat out of the smokers at different temperatures, and yet most recommend doing so when it reaches 170-190°F to 200-220°F.
How Long to Rest the Meat Before Carving
The whole idea behind letting meat rest before carving is to allow the juices to stay inside. When you cut into your meat too early, the tenderness you worked so hard to achieve will be for nothing!
With that in mind, how long you need to wait before carving your meat will depend on how big of a cut it is and how soft you want it to turn out.
In short, every ten minutes you leave the meat to rest, you’re retaining around four tablespoons of moisture. Additionally, we recommend that you let the meat stay someplace warm with a thin layer of foil loosely on top.
Fatty cuts, such as briskets and pork butts, for example, should typically rest for 40 minutes after removing them from the smoker.
Learn the deets: How to Keep Brisket Moist During Smoking
Summary
In this guide, our aim was to help you know the basics of how to smoke meat for the first time. We hope that we covered most, if not all of your burning questions above. By now, you should have the confidence to fire up that smoker and get to cooking!
Smoking meat may be a slow cooking process, but biting into a tender, juicy, and smoked cut will make the effort ten times worth it. You’ll be falling in love with the idea before you know it.
Good luck smoking meat for the first time!
